Is Learning to Shape Clay on a Pottery Wheel Easier Than You Think?
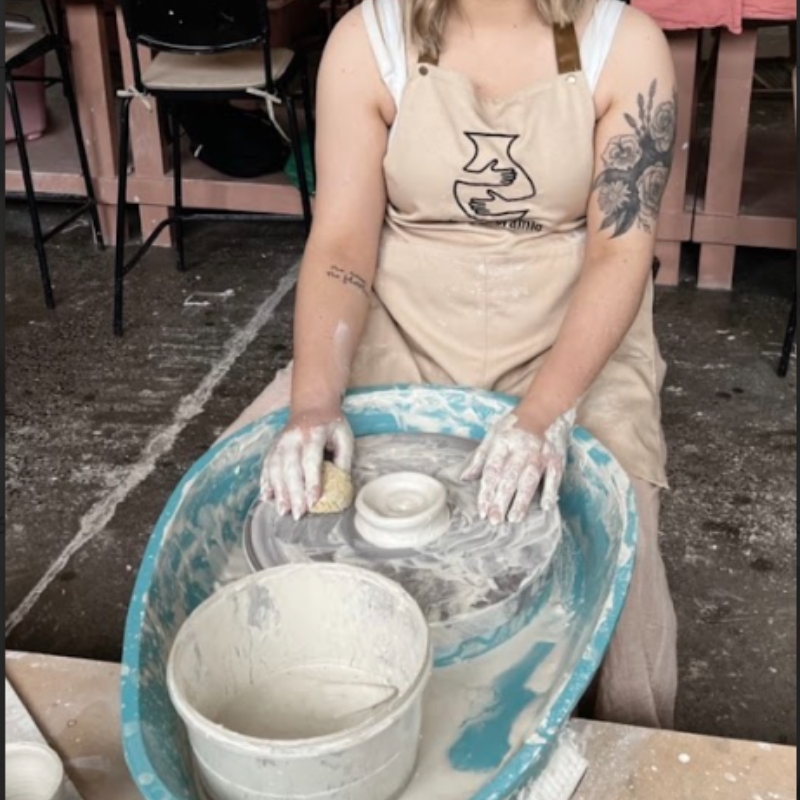
If you have ever watched a potter guide spinning clay into a perfect bowl and thought, “I could never do that”, you are in good company. Most newcomers arrive at our studio convinced wheel throwing must be painfully hard, super-messy, or only for the naturally artistic. The good news? Those fears rarely match reality. In fact, many first-time students walk away from their very first session with a small cup or bowl they are genuinely proud of.
In this article, we will break down the real learning curve, show you which skills click quickly, where the genuine challenges hide, and how simple tweaks in posture, clay prep, and mindset set you up for early wins. If you decide you would like guided support after reading, our popular Wheel Throwing Workshop for Beginners runs weekly in Melbourne and is designed around the very principles you will find below—but let us start by tackling the biggest myths.
Myth-Busting: Why Wheel Throwing Looks Harder Than It Feels
1. The “All-Thumbs” Myth
Many adults worry they have “clumsy” hands or poor coordination. In reality, wheel throwing relies more on learning steady pressure than on raw dexterity. Once you feel how clay responds, muscle memory builds fast.
2. The Power Misconception
People often try to muscle the clay into shape. Successful throwing is about firm, even pressure—not brute strength—so children, retirees, and anyone without gym-level biceps routinely succeed.
3. The Mess Factor
Yes, there is clay and slip, but with a damp sponge, a splash pan, and an apron, cleanup is quick. Studios teach tidy habits from day one.
4. The Long-Term Commitment Fear
Some think pottery demands years before producing a usable vessel. Most beginners in our studio finish a small cylinder or bowl in their first session, glazing included.
A Beginner-Friendly Roadmap: The First Five Skills You Will Tackle
- Centering
- Opening the base
- Pulling the walls
- Shaping the form
- Trimming and finishing
Let us look at what each step involves and how long it usually takes to click.
Centering
- What you actually do: Use both hands to stabilise the spinning clay until it stops wobbling.
- Typical time to “get it”: 10–20 minutes of guided practice.
- Early win you will notice: The clay mound feels smooth and balanced under your palms.
Opening
- What you actually do: Press thumbs to create the initial well.
- Typical time to “get it”: Minutes once centering is stable.
- Early win you will notice: You see a neat, round cavity form.
Pulling Walls
- What you actually do: Lift clay upwards with fingertips to create height.
- Typical time to “get it”: 2–3 attempts.
- Early win you will notice: The cylinder grows taller without collapsing.
Shaping
- What you actually do: Gently expand or narrow walls for bowl, cup, or vase contours.
- Typical time to “get it”: Same session after basic pulls.
- Early win you will notice: You recognise an actual vessel shape.
Trimming & Finishing
- What you actually do: Refine the foot and smooth the surface when leather-hard.
- Typical time to “get it”: Second visit or take-home task.
- Early win you will notice: The piece looks tidy and ready to dry.
Most absolute beginners can reach the “Shaping” milestone within a single two-hour workshop. Anything past that is refinement, not magic ability.
The Real Challenges (and Smart Ways Around Them)
Knowing the tougher parts of the learning curve helps you target practice instead of doubting yourself.
Body Position and Comfort
A cramped stance strains wrists and lower back. Our earlier blog on how to improve control on the pottery wheel dives into posture tweaks, but the headline tip is simple: keep elbows braced against your torso for stability while letting the wheel, not your shoulders, do the work.
Reading Moisture Levels
Clay that is too wet flops, clay that is too dry cracks. The trick is feeling slight tackiness without slurry running everywhere. Spritz water lightly rather than pouring, and stop to sponge the batt when puddles form.
Consistent Wall Thickness
Uneven walls lead to wobbles in the kiln. Try marking your index finger with slip at the desired thickness; when the mark vanishes inside the wall, you are on track.
Letting Go of Perfectionism
Instagram bowls with flawless curves are often the potter’s fiftieth attempt. Aim for functional, not perfect, at first. Imperfect pieces still serve morning coffee—and remind you of progress.
How Melbourne Weather Shapes Your Clay Experience
Victoria’s famously changeable climate adds local quirks to pottery practice.
• Winter humidity helps slow drying, giving beginners more working time.
• Hot northerly winds in summer can dry rims before bases within minutes; cover pieces with plastic between throws to even moisture.
• Melbourne’s cooler evenings mean you can leave leather-hard work on the shelf overnight without cracking, something Sydney and Brisbane potters envy.
Paying attention to ambient moisture keeps your learning curve smooth no matter the season.
Self-Learning vs Guided Workshop: A Practical Comparison
Below is a snapshot of what you gain from each pathway. Use it to decide which suits your budget, schedule, and learning style.
Learning Solo at Home
- Wheel hire/purchase, clay, tools, kiln access
Joining a Beginner Workshop
- One-off class fee includes equipment, clay, tools, glazing, firing
Feedback Speed
- Trial-and-error, online videos
- Immediate demonstration and hands-on correction
Common Roadblocks
- Centering frustration, under-firing pieces, lack of kiln
- Rare—studio handles firing, tutor adjusts technique
Social Element
- Solo pursuit
- Meet like-minded creatives, share tips
Progress Pace
- Variable—depends on persistence
- Structured curriculum fast-tracks fundamentals
Many hobbyists start at home, hit a technical wall, then attend a workshop to troubleshoot. Either direction works; mix and match to suit time and budget.
Safety Basics You Should Not Ignore
Wheel throwing is low risk, yet good habits protect your body and lungs:
- Ventilate when sanding dry greenware—silica dust should never be inhaled.
- Keep hair tied back and remove dangling jewellery to avoid wheel snags.
- Clean splash pans promptly; dried slip can harbour mould.
- Adjust seat height so hips are level with the wheel head, easing back strain.
The Victorian studio standard we follow aligns with recommendations from Creative Victoria, ensuring healthy, inclusive spaces for learning.
Signs You Are Progressing Faster Than You Think
- Early Sign: You centre a 500 g ball in under 30 seconds
- What It Indicates: Muscle memory is forming
- Next Skill to Practise: Try 800 g to build strength
- Early Sign: Cylinder walls stay even after three pulls
- What It Indicates: Pressure control is solid
- Next Skill to Practise: Experiment with outward shaping
- Early Sign: You can wire-cut off the wheel without distortion
- What It Indicates: Base thickness is consistent
- Next Skill to Practise: Move to taller forms or closed shapes
Ticking even one of these boxes in your first month means you are on the right track.
Frequently Asked Questions
1. How long does it really take to throw a decent mug?
With weekly practice or a structured course, many beginners complete a functional mug (including handle and glaze) within four to six sessions. The throwing part is quick once centring clicks; attaching a handle and glazing are the slower steps.
2. Do I need expensive tools to start?
No. A basic wooden rib, wire cutter, needle tool, sponge, and trimming tool cover 90 percent of early tasks. Studios provide these; if working at home, starter packs cost less than a night at the movies.
3. Can children learn wheel throwing safely?
Yes, with supervision. Kids as young as eight can centre small clay balls and make simple bowls. Adjustable stools and slower wheel speeds keep the process safe and fun.
4. What if my first few pieces collapse?
Collapses usually signal over-wet clay or uneven pressure. Re-wedge the clay, reduce water use, and steady your elbows. A quick tutor demonstration often fixes the issue in minutes.
5. Will wheel throwing improve my mental well-being?
Many potters report stress relief and a mindful, meditative flow. Touch-based creative hobbies engage the senses and can lower cortisol—one reason mental-health groups increasingly recommend clay activities.
Final Thoughts
Learning to shape clay on a wheel is far less intimidating once you know the real hurdles and how quickly most beginners overcome them. Whether you practice at home with YouTube tutorials, join friends for a casual studio session, or enrol in a structured course, the earliest wins come faster than Instagram might suggest. Stay curious, keep your expectations realistic, and celebrate each lopsided cup—because progress, not perfection, is where the real satisfaction hides.
If you ever feel stuck or simply want guidance from day one, a local workshop can shortcut the trial-and-error phase and connect you with a welcoming clay community. Either way, your first spin of the wheel might just surprise you.